Invader Weaponry
Phoenix II —FAQ (IOS)

BOOKMARK
FAQ (IOS) by light_rock_zz
Version: 5.3 | Updated: 08/18/2025
FAQ of the Month Winner: January 2020 | Highest Rated Guide
Invaders
Invader Weaponry
| Strategies to counter Invader Weaponry | |||||||||||
|---|---|---|---|---|---|---|---|---|---|---|---|
| Darts | Pellets | ||||||||||
Darts
There are 4 types of dart turrets:
- Dart Streamers, which only come from the middle turrets of Herons
 and Sparrows
- Dart Launchers, tracking ones which track you quickly
- Dart Spreads, which lock onto you very quickly
- Dart Spinners
Darts are quite generic bullets.
- Their slightly less plentiful quantities mean that Point Defence
 works quite well against them.
 - Bullet EMP
 also works well against darts as well, due to how easy it is to graze off darts and earn lots of Bullet EMP.
 - On the contrary, Phalanxes
 don't hold up too well since they break easily.
 - Barriers
 will hold up fine, but at higher ranks, they hardly last so it starts to falter, especially when fast moving darts prevent you from placing barriers upfield and making use of the inner lining.
Dart Streamers
There are also Tiers 1A and 1B of Dart Streamers.
- Tier 1A only fires 1 dart per burst and waits a while before firing.
- Tier 1B fires the normal 3 darts per burst and fires them immediately after the Invader has arrived.
Strategies
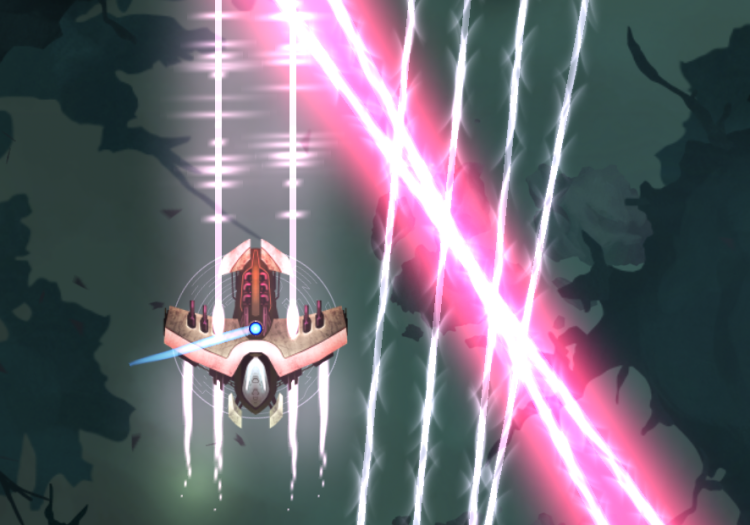
- These dart streamers can get very annoying if they are of a high Mk, as they essentially form a wall that you need to keep between.
- Even if they don't reload too quickly, due to the random movement of both Herons and Sparrows , they will spread the 3 downward facing darts at different positions along the x-axis, which can take up a lot of horizontal space.
- The highest Mk dart streamers are near impossible to dodge through and one would need to stay within the moving walls.
- Fortunately, any form of bullet clearing Auras
 are able to solve this walling problem by breaking a hole to break free of the tight horizontal space confined between the dart streamer walls.
- Vorpal Lance
 also works to break through the dart streamer walls.
- Vorpal Lance
- As a speedrunning strategy, grazing along these moving walls can build up Aura for offensive usage.
- Take note however, that doing so relies a lot on RNG since how the walls move depends on the random movement of Sparrows and Herons .
- If you want to attempt this, only do this downfield, as the RNG movement will make you die easily if you go too near to these dart streamers.
- Note that due to the presence of other bullets, you would only usually graze the dart wall for a short while before needing to take evasive measures against other bullets.
- Take note however, that doing so relies a lot on RNG since how the walls move depends on the random movement of Sparrows
- Against Sparrows , it is not usually recommended to graze their dart streaming walls because there are too many of such Sparrows when this occurs.
- Also, the walls move rapidly and randomly, so you also need to move fast, which is very hard in the presence of other bullets around.
- A good guideline is 2 dart streams that form a wall is the maximum that one could tolerate before the walls may start to cross each other and cause too many impenetrable junctions between walls, necessitating bullet clearing means.
- Ironically, grazing dart streams of 3 is too dangerous as darts are very fast bullets. Thus, it is not worth the risk to do so.
- You'll need to follow the fast movement of the downward facing darts and then slowly graze from left to right (or vice versa).
- It's just not very practical compared to continuous dart streams that form walls because it's hard to visualize how to graze off such a short stream of downward moving darts.
- On some occasions, you may get inescapably trapped if you start in the middle.
- In such cases, start at the far side of the screen to get all the turrets firing towards the side, then dash under them to a safer spot. It is possible to dash in between dart streams, but it is pretty hard and will take some skill.
Dart Launchers
T1 and T2 dart tracking turrets continuously track onto your core, even as they fire.
- Do not make large movements as that will cause a lot of misaligned darts or darts that start forming X patterns, which can block your exit very quickly.
- This is particularly with T2 dart tracking turrets with 2 side by side lanes of darts. Causing T2 dart tracking turrets to mis-align when firing will very quickly cause a barricade.
- As Tier 1A and 1B of dart turrets are indistinguishable by appearance, you will only know if the dart turrets are T1A after playing through the waves.
- Tier 1A dart launchers are of little threat.
- In fact, because take quite some time before firing, charging a long charging Zen
 such as Mega Laser
  or Mega Bomb
  is easy so long you aren't too near to these turrets.
 - However, they can catch you off by surprise, especially in the presence of Tier 1B dart launchers as well.
- In fact, because take quite some time before firing, charging a long charging Zen
- It is possible to stay completely still when faced with purely and only T2 dart tracking turrets as the 2 lanes of darts will pass right by you., which can be called the inside graze.
- However, this is generally not recommended due to the other bullets that may be present on field.
- Furthermore, darts do not change direction after they are fired, this means you must stay still for the entire time the darts are fired for the 2 lanes to pass by you, which can be very lengthy.
- When faced with only pellet spreads and spinners that are still far from firing, this strategy is possible, and particularly useful for speedrunning as a means to gain Aura.
- The example below illustrates an extreme case, although it has a much higher success rate the further away you are from the T2 dart turrets.
- However, if the wave only contains T2 darts with no other dart turrets, this can be a very viable speedrunning strategy, especially if you have a long charging offensive Zen such as Mega Bomb or Mega Laser .
- If the T2 darts are on Ravens
 only, charge your Zen on the opposite side of the T2 dart turrets on Ravens.
 - So for example, if the T2 darts are only on the left turret mount of all the Ravens on field, charge your Zen on the right side of the field.
- Adjust upfield or downfield where necessary.
- Doing this has a higher chance of survival compared to charging on the same side of the T2 dart turrets on Ravens , as the T2 dart turrets may be too close to you for the 2 side-by-side darts to pass by your core, aka the inside graze.
- If the T2 darts are on Ravens
Dart Spreads
- T3 and T4 Dart Spreads will achieve a very brief lock-on onto your core before firing.
- While firing, the turret no longer turns, which means that the dart lanes are much straighter compared to T1 and T2.
- The Invader is also locked in place, causing very little variance in the pattern between bursts.
- Very minimal RNG movement is still possible.
- This minimal Invader random movement will usually throw off the straight lanes slightly, similar to pellet spreads and spinners.
- This also makes it difficult to charge Zens properly, including even Reflex EMP
 or Teleport
  since darts are fast bullets.
- The strategy to counter them is to slowly inch your way horizontally.
- Do not make large movements as that will cause a lot of misaligned darts or darts that start forming X patterns, which can block your exit very quickly.
- Because of the need to briefly lock-on for T3 and T4 dart tracking turrets, there are some additional higher level strategies to them.
- It is possible to circle around these dart tracking turrets such that they never fire, since dart spread turrets require a very brief moment of lock-on with your core before they fire.
- However, this is possible if there are purely only T3 and/or T4 dart tracking turrets left in the wave.
- Together with boomerangs
 and/or lasers
  , this circling strategy could also work.
 - But with pellets, shurikens and MIRVs
 , it's probably not going to work out too well.
- Together with boomerangs
- T3 and T4 dart tracking turrets are a great hindrance to speedrunning since they often prevent you from switching sides of the field quickly.
- Try your best to pop off all T3/T4 Dart Spreads on one side of the field so that you can have more space on the other side of the field.
- Then simply distract the rest on the other side of the field, allow them to fire, and then duck under all the streams to be clear of them all.
- For survivability purposes however, T3 and T4 dart spreads can sometimes be treated as a T1 dart tracking turret (and more lenient one since the lanes are straight), especially when you are looking at strafing very slowly.
- Do not ever go point blank with these T3 or T4 turrets no matter your objective, unless they are stunned or you have a Chrono Field
 deployed. (I won't recommend dashing in with Personal Shield
  either since your exit will be difficult)
 - It is best to learn to move slowly and take advantage of the grazing potential.
- Always try to ensure that all the T3 and T4 dart spreads are synchronized, that is, they all fire at the same time as far as possible.
- In this regard, T3 and T4 dart spread turrets with different Mks (thus different reload speeds) can often spell huge disaster, especially in the presence of boomerangs in the mix.
- This is fortunately, usually very rare.
- As an extreme speedrunning strategy, one could turret ride / inside graze a T4 dart spread, and gain a lot of free Aura.
- Take note that this only works if there's only one dart spread and no other dart launchers around you.
- As T4 dart spreads fire quickly, it is difficult to get into position quickly enough so you won't get shot point blank.
- Thus, it's only recommended only if you can temporarily stun the turret, which translates to only using Stun EMP
 , Destructive Bullet EMP & Bullet Detonator Bullet EMP.
- While it can be done with Point Defence , it would deplete Point Defence very fast and may not even last against a full burst of a T4 dart spread.
- While it can be done with Point Defence
- This requires a lot of practice, particularly being able to quickly shift into the anulus ring region such that you can perform this turret riding / inside grazing. While you can do the same for a T3 dart spread, the risk is generally not worthwhile.
Dart Spinners
- There are gaps between consecutive dart streams of the same lane which you can sometimes make a daring jump when faced with say, shurikens that may be cornering you off.
- For speedrunning, dart spinners are a great treat, simply put yourself in the spot very slightly offset where 2 lanes of darts intersect and you gain a lot of free Aura .
- In speedrunning, where grazing is a very important tool to go fast, particularly to get more Aura , you should not destroy dart spinners as darts are the easiest to graze.
- However, T4 dart spinners are extremely dense.
- Thus, one of them should be destroyed.
- If the wave has no other high level threats like boomerangs and MIRVs however, it may be possible to survive with 2 T4 dart spinners active.
- However, T4 dart spinners are extremely dense.
Pellets
There are 4 types of pellet turrets: Launchers, Spread, Spinner (Lane) and Spinner (Spiral).
Pellets are slower moving bullets.
- They primarily benefit Bullet EMP , since the radius
 based Aura means being able to clear a lot of bullets.
 - Phalanxes also work great against pellets for this reason, since shoveling bullets can get rid of many pellets quickly.
- Point Defence will start to really struggle against pellets due to their plentiful quantities.
- Surprisingly, barriers actually work very well, due to the fact barriers are able to break up the continuity of pellet lanes, thus giving space for players to dodge through.
Pellet Launchers (Daily Missions)
T1 Pellet Launchers in Daily Missions are of no threat, and are even beneficial due to how easy it is to graze them. Eliminating them is not required at all unless they are the last turrets remaining.
T2 Pellet Launchers on the other hand, can be a massive annoyance due to how tightly packed the pellets are side by side.
- They are not dangerous on their own, but combined with any other spread turrets (even pellet spreads, although rarely), it can easily cage you in like a C claw, leaving you with no way out.
- It is possible to dodge between them in higher Acts such as Act 4 and above by being all the way downfield, but it is not recommended due to how difficult it is.
- Despite their annoyance, being T2, they usually come in plentiful quantities.
- However, there are usually more dangerous turrets to get rid of.
- If T2 pellet launchers appear on Vultures
 or larger, they should be eliminated after all other threats are neutralized, since pellets hang around for a long time and can affect the next wave.
Pellet Spreads (Daily Missions)
- The further upfield they are, the less dangerous they are due to the gap opened up by the time the pellet spreads reach downfield.
- When several of them are spread around the field, they can become dangerous.
- If there is only one pellet spread on an Invader, it is usually easy to deal with since you can simply go between the pellet lanes, which also rewards a lot of Aura .
- However, 2 pellet spreads on a Heron is generally one of the worst cases since the pellet spreads are near enough to each other in that their overlap makes it very difficult to overcome.
- They also move rapidly, so several of these Herons can cause an extreme blockade.
- If the Herons are on the left and right sides of the field, this would be a nightmare scenario.
- If the Herons all gather at the center however, the strategy would be simply to go around the sides to avoid the clustered patterns entirely.
- They also move rapidly, so several of these Herons
- On Eagles
 , 2 pellet spreads on the left and right turrets are distanced far apart enough in that one can go near to the Eagle itself to avoid the pellet spreads entirely.
 - On Vultures or above, they would be far enough from you to disperse the pattern so you have more dodging space as you go through the pellet spreads.
- Otherwise, you could also go near enough to the Vulture to avoid the pellet spreads entirely.
- Otherwise, you could also go near enough to the Vulture
Pellet Launchers (Community Missions)
- For pellet launchers, they appear as mostly harmless since the volume of pellets they produce is generally low.
- However, these quickly get annoying when mixed with other types of pellet turrets as pellet launchers are fired at random positions, and they can blend into pellet streams, making them very difficult to spot.
- They can be a common cause of death due to the fact they are easily masked.
- Be very observant for pellets, especially when wedging yourself between bullet streams (whether pellets or darts).
- Prepare your defensive options such as Bullet EMP or Point Defence to eliminate these misaligned pellets if you get trapped, because it is a very real possibility.
- Chrono Field also helps to get yourself out but it is sometimes not reliable since such pellets from launchers can be everywhere.
- Chrono Field
- In speedrunning, these pellet launchers are annoying and should be gotten rid of, particularly on Ravens or Herons . For Vultures and above, as they do not move much, they are generally not a threat and you should not destroy them.
Pellet Spreads (Community Missions)
- For pellet spreads, be very careful of how you approach them.
- Multiple pellet spread turrets mean that you must be very careful to enter any one of the more appropriate pockets defined by the pellet lanes since pellet lanes have no break in continuity until they stop firing.
- Generally, the pockets in the middle of the field are safer than pockets at the side of the field.
- However, this relies quite a bit on RNG as Invaders may position themselves differently when they fire the pellet streams.
- Never assume pellet lanes are straight.
- They are never straight and even though the pellet lanes appear as though they are one straight line, more often than not, they are not perfectly straight.
- This means that charging Mega Bomb or Mega Laser between waves is a big problem.
- Be sure to estimate that the end of the pellet stream will not hit you before proceeding to charge Mega Bomb or Mega Laser .
- You may wish to be careful about firing off an Ultimate level Bullet EMP as resetting pellet spreads will cause them to fire again immediately, particularly when the pellet spread turrets are in their cooldown state.
- In speedrunning, pellet spreads are also a joy as they are easy to graze, particularly you can position yourself such that you can graze more than 2 pellet lanes and get tons of free aura.
- When combined with other bullets, it may be necessary to eliminate one pellet spread but see eliminating pellet spreads more of a last resort.
Pellet Spinners (Lane)
- For pellet spinners (lane), you need to quickly find a small safe diamond spot between 4 streams of pellets where you can hide in if you are unable to pop off one of the pellet turrets quickly enough for the spinners to flood the field.
- You usually only move into this spot last minute.
- Otherwise, other bullets will stack upon you which will reach your safe spot.
- A good idea is to very quickly swap sides of the field just as the pellet streams from pellet spinners are about to reach you.
- Again, assume pellet lanes are never straight. It is common mistake to assume so for T4 pellet spinners where the diamond spot is very small and tight, which means a high margin of error.
- You may charge Mega Bomb or Mega Laser for pellet spinners (lane) up to T3 (beware of T3 because there is a high chance of dying), but do not do so for T4 pellet spinners (lane) as you will almost certainly die (even in Act 5 or 6).
- You may charge Mega Bomb
- As pellet streams from pellet spinners usually last quite long, graze off the pellet streams so that you can recharge your defensive Auras to deal with other bullets from other tracking turrets.
- Using a Bullet EMP which can be accumulated from grazing pellet streams is a good idea to reset pellet spinners.
- Using a Bullet EMP
- In speedrunning, T1 & T2 pellet spinners are generally quite safe and you should not destroy them.
- However, T3 & T4 pellet spinners produce such tightly clustered streams of pellets, that it is usually recommended you destroy one of them quickly before it gets to fire, unless you are capable enough to handle them, or have defensive options with you.
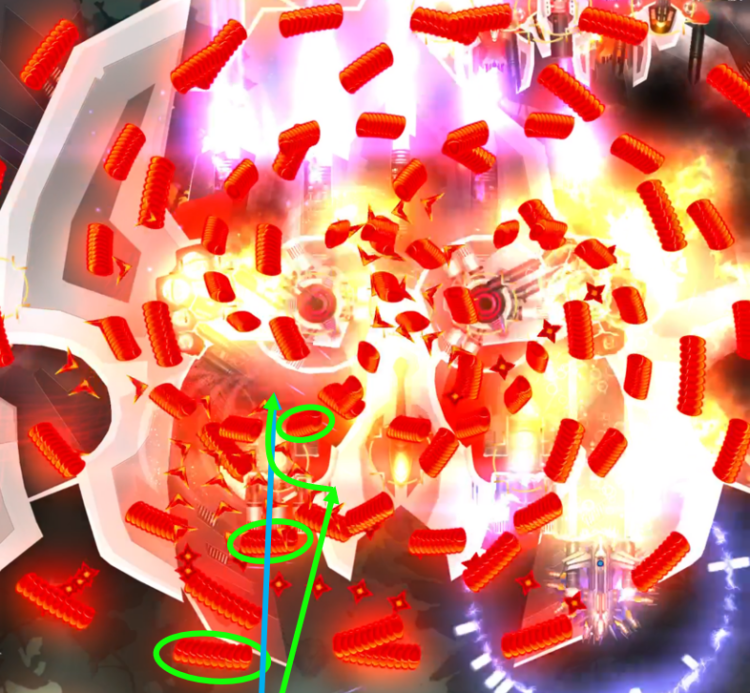
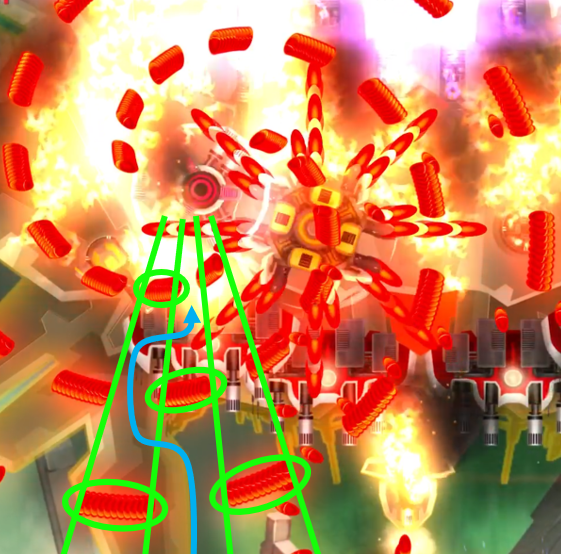
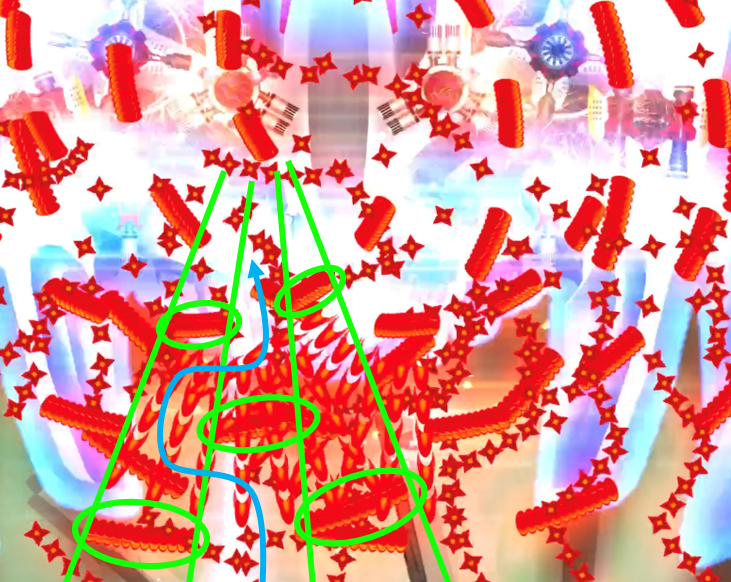
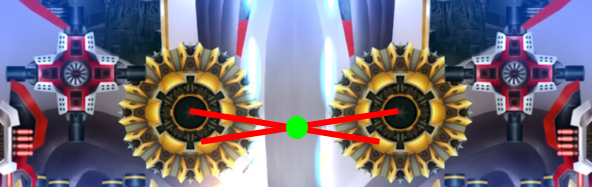
- A very advanced speedrunning technique that can be done is known as turret riding, or inside graze.
- The basis of this technique is that there is a very small ring which is a safe spot where bullets do not hit you. Yet, you will not die because of turret collision.
- It takes skill to be able to find this spot quickly enough.
- When pulled off correctly, you will be able to gain a lot of Aura , which is useful for offensive Auras, especially Bullet Detonator Point Defence.
- This is recommended against T3 and T4 pellet spinners (lane).
- The safe region of doing a turret riding or inside graze is just on the most outward portion of the bullet barrels, as shown in the annotated screenshot.
Pellet Spinners (Spiral)
- T1 pellet spinners (spiral) don't usually pose much of a threat due to how thin of a width each group is.
- However, when it starts to come to T3 spinners, the width of the group can be quite significant.
- Paired together with darts, or even other pellet spinners (lane or spiral), this can easily entirely block your way.
- Unfortunately, you just have to quickly be able to find a spot to escape to where the pellet groups and the other bullets don't form a C cage looking to trap you.
- If there is no such means, you might have to resort to some form of bullet clearance.
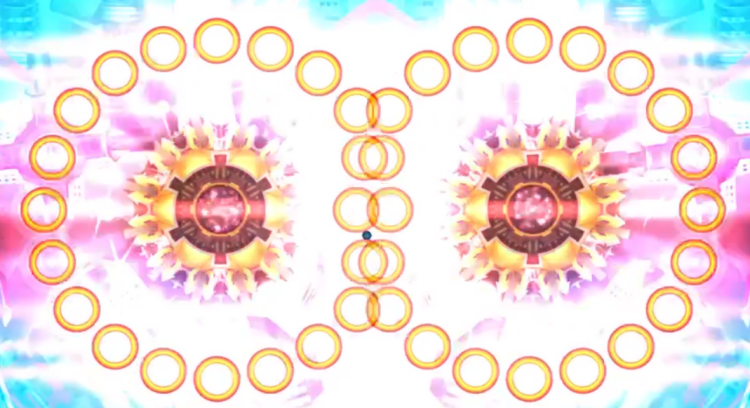
- For T1 & T3 pellet spinners (spiral), the rings are radially aligned, which means that you can simply stay in one lane and you'll be safe from the pellet spinners (spiral).
- In these cases, these T1 & T3 pellet spinners (spiral) act similarly to pellet spinners (lane), except you can weave between lanes more easily. Here's the patterns generated from T1 (left) & T3 (right) pellet spinners (spiral):
- In these cases, these T1 & T3 pellet spinners (spiral) act similarly to pellet spinners (lane), except you can weave between lanes more easily. Here's the patterns generated from T1 (left) & T3 (right) pellet spinners (spiral):
- For T2 pellet spinners (spiral), it depends what is the exact tier.
- Tier 2A is the only tier where the rings are radially aligned.
- In Tier 2B, subsequent rings are slightly rotated clockwise so you can still find a slanted lane that you can pass through, assuming there is only one Tier 2B pellet spinner (spiral).
- However, since there are usually 2 of these, it is only possible to find certain periods of time where there are gaps between intersecting rings that you can pass through.
- In Tier 2C and 2D, it is not possible to find a slanted lane which you can pass through, which forces you to zig zag between ring layers.
- From left to right, Tier 2A, Tier 2B, Tier 2C & Tier 2D.
- As a general recommendation, it is better to try and dodge through bullet groups from pellet spinners (spiral) from the sides of the field rather than the middle
- This is because the orientation of half the groups would be such that they are traveling more towards the sides than to the front.
- Thus, it is easier to find a gap between the other half of the groups to dodge through them.
- Trying to dodge through T4 pellet spinners (spiral) is probably one of the hardest things to do in this game.
- It is almost necessary to pop off one of them in order to survive if you do not possess any means of bullet clearance.
- You can try going upfield and to the extreme end of one side, which means being to the left or right of pellet spinner (spiral) itself,
- This has a slim chance of survival.
- This also means being extremely upfield, which is dangerous when paired with other turrets.
- If you have some form of bullet clearance, pellet spinners (spiral) are quite easy to deal with.
- Simply graze along the group from one end to the other, and it is very easy to regain enough Aura to break through them.
- This is especially so when you have Bullet EMP or Point Defence .
- If you have an Aura that is counter
 based, doing this would also help a lot.
- Note that with Vorpal Lance , it's a little bit more risky than normal to try and cut a straight beeline using Vorpal Wake
 through all the pellet groups coming towards you.
 - But it is possible with practice, and is generally a good way to take advantage of it for purposes of speedrunning.
- Note that with Vorpal Lance
- As the pellet groups are tighter the closer they are to the spinners themselves, it is a better idea to graze early rather than later.
- It is the same gain in Aura whether or not how early or late you do it, assuming you graze all the bullets in the pellet group of course.
- The further out the pellet group is, the bigger of a blockade they would become, making it harder to deal with.
- It is the same gain in Aura
- Unfortunately, even on the largest field size of Act 5 / 6, the gaps between 2 bullets in a pellet group is simply not large enough to attempt a safe passthrough.
Shuriken Launchers
- Shuriken launchers track you slowly and flood the field if you do not quickly get rid of them.
- Even as a veteran player, shurikens are among the most annoying bullets in the game.
- It is very difficult to predict where they are going since they only appear as spinning counter clockwise, with no indication of which direction they are headed.
- This makes dodging shurikens very difficult.
- Always be sure to keep a distance away from shuriken turrets as they come out of the turret extremely fast.
- No defensive option that can deal with that fired speed.
- Usually, keep a minimum distance away from shurikens (just outside the grazing range) to avoid dealing with their difficult to predict movement.
- However, if you are certain that the shurikens are coming out from a T1 or T2 forward scattering shuriken launchers, it is recommended to graze them as grazing a predictable arc of shurikens is quite easy.
- In speedrunning, T3/T4 shuriken launchers are the most annoying turrets and should be gotten rid of as soon as possible.
- It is 3rd priority to eliminate them after MIRV turrets and boomerangs .
- You can go right up to the Invaders' cockpits and stay there as these shuriken launchers take time to turn their way towards you.
- Only do this if it is an Eagle with shuriken launchers at both ends (and not the middle one), or a Vulture with shuriken launchers as the 2 outermost turrets.
- Only do this if it is an Eagle
- It is 3rd priority to eliminate them after MIRV
- When faced with a shuriken cloud, you can graze off the edges of the cloud.
- This is difficult as mentioned, due to the difficulty associated in predicting their movement.
- This is usually only recommended between Act transitions, but go ahead and do it mid-wave if you can handle it.
- Teleport is the best defence against shurikens since you can easily escape shuriken clouds, and even T4 shuriken spinners are not a big problem.
- Phalanx is also an excellent defence against shurikens as the shoveling action can clear a whole cluster of shurikens, and the Fade Out time of Phalanx means a huge amount of shurikens can be cleared with Phalanx.
- The fact you have 6 counters of Phalanx means you can delete whole bunches of shurikens on field.
- Just be careful to watch your Phalanx , as lasers and other bullets can drain your Phalanx's strength and make it last shorter than expected.
- The fact you have 6 counters
- Point Defence is generally a bad defence against shurikens since the mass volume of shurikens drain Point Defence fast.
- If you really need to use Point Defence against shurikens, use it in bursts.
- Fire one burst, move closer to where you want to go (go nearer to the remainder of the shuriken cloud), and then fire off the next burst, and repeat until you are clear of the cloud.
- Do not ever use Point Defence to push forward against the shuriken cloud as that will drain Point Defence too fast.
- Instead, use Point Defence to cut across shuriken clouds sideways.
- If you really need to use Point Defence
- Bullet EMP works well to eliminate most of the shuriken cloud as well, but it is a one time use.
- You can however, attempt to graze off other bullets (or even the remaining shurikens if you dare) to regain a bit of Bullet EMP and use it in small bursts to cut through shuriken clouds.
- You can however, attempt to graze off other bullets (or even the remaining shurikens if you dare) to regain a bit of Bullet EMP
- Barrier doesn't work too well against shurikens due to the pure volume of shurikens.
- However, very small barriers around yourself can work to cut through shuriken clouds.
- Just make sure not to use it at the last minute.
- However, very small barriers
- It is possible to stay completely still and let T2 shuriken launchers lock on perfectly onto you. Both the shuriken lanes will pass by your core perfectly.
- However, it is an impractical strategy due to the slower tracking speed of T2 shuriken launchers.
- With higher tier T3 & T4 shuriken launchers, this can be a high level speedrunning strategy, especially when paired with a dual wield defensive + offensive Aura (this usually means Bullet Detonator Bullet EMP / Bullet Detonator Point Defence).
- This technique, known as the inside graze, gains you lots of Aura through lots of grazing.
- You would require to be at almost point blank range with the turret, which is possible because the turret's middle does not emit bullets.
- Doing this correctly allows the shurikens to just shoot past your ship core.
- However, due to the slow turning speed of shuriken launchers, being able to slot yourself at such point blank range is only possible if the shuriken turrets are taking a break after a long burst, have barriers at hand or use Personal Shield .
- In any case, this is terribly difficult and only for elite speedrunners.
- This technique, known as the inside graze, gains you lots of Aura
Shuriken Wave Launchers
These shuriken wave launchers appear identical to the shuriken launchers, but instead of silver rims, they have golden rims. These shuriken wave launchers track much faster than shuriken launcher counterparts. They track at about the same speed as boomerang ![]() turrets, if not, faster, but slower than dart tracking turrets. However, the difference is that they only fire once they achieve a brief lock-on to your ship's core, similar to dart spreads.
turrets, if not, faster, but slower than dart tracking turrets. However, the difference is that they only fire once they achieve a brief lock-on to your ship's core, similar to dart spreads.
- T1 shuriken wave launchers don't flood the field quickly, hence they are not very deadly.
- T2 shuriken wave launchers can get annoying fast because they spread out the cluster of shurikens into 2 sections instead of one from a T2 shuriken launcher.
- Furthermore, because they track fast, they have the capability to spread shurikens in 2 wide arcs by tracking your movement.
- The RNG movement of Invaders make it all the worse, making these shurikens being shot out in 2 mostly straight lines terribly difficult.
- If you are not faced with other tracking turrets, try not to make rapid movements to align these shurikens in straighter lines.
- Strangely, while a T4 shuriken wave launcher also exist, T3 shuriken wave launchers can be the most dangerous turrets.
- This is because you are left with no choice but to dodge between 2 arcs of shurikens, usually necessitating a zig-zag navigation, which is extremely difficult.
- Otherwise, you will have break a hole in the pattern by using Bullet EMP or Phalanx .
- The final alternative is to squeeze between the arcs, but you will need to do so twice, which is very difficult.
- T4 shuriken wave launchers produce shurikens that look very intimidating since they appear to be simply spreading shurikens everywhere.
- However, simply stay downfield to allow these shuriken wave launchers can lock onto you.
- You can then find a small safe spot when there is a small, but clear passageway for you to comfortably traverse.
- Be careful of other bullets such as MIRVs and pellets even as you traverse this passageway.
- Darts take up a considerable amount of space so be careful of them.
- Most of the time however, because it can be difficult to wait such a long time to find a clear passageway, it is more convenient to simply deploy a Bullet EMP or Phalanx to push your way through.
- In the absence of MIRVs and darts, bear in mind you do not always have to waste a Bullet EMP or Phalanx just to get through these shuriken patterns.
- An Eagle equipped with all 3 T4 shuriken wave launchers is very possible to find a clear passageway.
- For T4 shuriken wave launchers that are on opposite sides of the field, it is usually possible to find a brief moment with a clear gap in the pattern to head towards, and then exit through the arcs.
- Do not go head on with these T4 turrets as you will have to face the other 2 sets of 2 arcs even as the middle set of arcs is not a problem.
- In the absence of MIRVs
- It is possible to graze shurikens fired from T1 and T2 shuriken wave launchers as they are fired in a predictable arc.
- In fact, it is beneficial to graze the arc since it is quite easy.
- For T3 shuriken wave launchers, it is possible, but once they fire in a continuous zig-zag pattern, it is not recommended to keep going in zig-zags as the movement needs to be precise and yet, you need to be fast.
- Don't try to graze shurikens from T4 shuriken wave launchers because you will likely get trapped and die.
- Instead, just survive through them by using some defensive means (most recommended), going between the chevrons (more recommended) or squeezing through tight gaps in the arcs (much less recommended, but sometimes necessary)
Shuriken Spinners
- You can pretty much treat T1-T3 shuriken spinners like shuriken launchers or spreads because it is difficult to distinguish between shurikens fired from a launcher, wave launcher or a spinner.
- However, for T4 shuriken spinners, the ones that usually appear to last nearly forever (especially for high Mk T4 spinners), it is recommended to stay in the middle of the field and follow through the pattern.
- Unfortunately, because of the presence of other shurikens and bullets, you sometimes need to cut between the pattern and thus through the shuriken pattern walls.
- This is extremely difficult, even for veterans.
- Prepare to launch defensive options, such as a very small Bullet EMP , Point Defence , or even Chrono Field .
- Point Defence is the best defence since it can be used in micro bursts and you only need to tap once to break through.
- If you are out of options, dodging through them is your only hope. Do this at the very bottom of the field since the shurikens would be more spread out by then. Good luck.
- Point Defence
- Firing an Ultimate level Bullet EMP works very well to reset T4 shuriken spinners.
- It is highly recommended you destroy one of the T4 shuriken spinners (sometimes, it is of even higher priority than MIRV Bloomers, if the bloomers are not of high tier or high Mk) so that you do not need to dodge or use your defensive options to break through the pattern.
- For speedrunning, if you are able to identify a line of shurikens produced from a shuriken spinner, these can be quite a joy to graze off since they move in a consistent manner once properly identified.
- For T4 shuriken spinners however, it is still recommended you destroy one of the spinners (unless they are no other dangerous turrets around and it is easy to navigate the pattern as such), and continue to graze off the walls of the shuriken pattern.
Boomerangs
There are 2 types of boomerang turrets, the straight firing kind and the split firing kind.
- Straight firing boomerang turrets (only T1 turrets) can be treated just like darts.
- Read the above for tracking dart turrets as the same strategies apply.
- Be warned that grazing off a boomerang from a T1 turret is much more dangerous and you should only do it if you are confident of it.
- You do not need to destroy T1 Boomerangs unless there's nothing else dangerous to destroy.
- There also exist very low Mk T1 boomerang turret that will only fire 1 or 2 boomerangs per burst, and these turrets are actually of some threat as they can easily go unnoticed among the mess of other bullets.
- It is possible to "ignore" a T1 boomerang and charge a long charging Zen like Mega Bomb or Mega Laser .
- Even as the T1 boomerang is locked onto you, there is a chance that the boomerangs will all miss you.
- It is a dangerous strategy, but one that might be worth trying as Mega Bomb and Mega Laser are all highly damaging Zens that make a huge difference in getting one more of these to go off in dense and/or heavier waves.
- The split firing boomerang turrets (T2 and above) are probably some of the most annoying turrets in this game.
- As they fire, head straight towards the mid point of the boomerang turrets, being within about 2 typical ship's height.
- The boomerangs will then curve around you as you approach them.
- It sounds counter intuitive to put yourself nearer to danger (it takes some practice to get used to it) but it works very well.
- However, this strategy is not always possible due to the presence of other bullets around.
- In this case, you can attempt a few other strategies.
- Another way to avoid boomerangs is what i like to call play the left-right game.
- If there is space to make a dash from one side of the field to the other, position yourself at one extreme side of the field.
- Wait for the boomerangs to fire, then quickly dash to the other side of the field.
- Stay there and repeat the process.
- Boomerang turrets also behave like T3 and T4 dart tracking turrets, they only fire when they achieve a brief lock-on to your core.
- Do your best to have all boomerang turrets fire at the same time before you head from one side of the field to another, as de-synchronization of boomerang turrets can be very hard to deal with.
- If you are really trapped at a corner of the field, due to pellet or dart spinners (in the case of General (−Pellets) missions), try your best to be around the region of the field at about halfway and 3/4 way from the top of the screen (vertically wise).
- Then as the boomerangs fire, retreat to the bottom corner of the field, if the boomerang turrets are T2.
- If the turrets are T3 or T4, only retreat slightly towards the bottom corner such that you would between the curve paths of boomerangs.
- If the only boomerang turrets are all the way at the back of the field and are T3 and below, you can simply stay at a bottom corner of the field and the boomerangs will never reach you.
- Bear in mind that even though T3 boomerang turrets will barely reach you, it can be a huge gamble.
- These split boomerang turrets are of the highest priority to eliminate (even above MIRV Bloomers), no matter if you are speedrunning or not.
- Do not attempt to graze boomerangs from higher tier boomerang turrets unless you absolutely know what you are doing.
- Only graze off one lane of them if you ever choose to do so, as grazing the intersection point of lanes is pretty much asking for death.
- The best defence against boomerangs are Point Defence and Barrier .
- The smallest deployable barriers work wonders against boomerangs due to their Fade Out time which continues to block off boomerangs.
- Point Defence works quite well since it eliminates bullets very quickly, but bear in mind it may not last very long due to it also clearing other bullets around it.
- Phalanx works quite well against boomerangs as the shoveling action pushes you out anyway, avoiding the boomerangs and even clearing bullets in front of you.
- However, retreating backwards can be risky. since Phalanx doesn't protect you from the sides.
- However, retreating backwards can be risky. since Phalanx
- Bullet EMP does not work very well due to their one time use - the next use may have limited effectiveness due to the small radius of bullet clear.
- Furthermore, a large Bullet EMP works to your disadvantage since the Ultimate
 resets boomerang turrets and causes them to fire again immediately, leaving you defenseless.
- Furthermore, a large Bullet EMP
- Personal Shield works well against boomerangs too, but bear in mind it only lasts for one burst of boomerangs and takes a long time to recharge.
- The first priority however, is always to use Personal Shield against lasers , since they are literally the best defence against lasers.
- You can use Personal Shield against boomerangs if there are no lasers in that wave.
- Personal Shield works well as you can sit for a while and wait for the right time to exit and be clear of other bullets too.
- The first priority however, is always to use Personal Shield
- The smallest deployable barriers
Normal Lasers
There are 2 types of normal laser turrets, cone and tracking.
- Cone Lasers are annoying turrets to deal with you can only every hope to follow between their laser streams, especially for Ravens .
- There is generally no way against cone lasers other than to eliminate the Invaders carrying such cone lasers quickly.
- In Vultures and above however, cone lasers are less of a threat due to their minimal movement and you should focus on eliminating other more dangerous turrets first (if any).
- Eagles are not too much of a threat with them unless they are behind (which is rare), but if so...well, good luck, because such waves are one of the hardest to deal with.
- No matter whether you are speedrunning or not, cone lasers on smaller Invaders should be gotten rid of as soon as possible.
- Especially Ravens , although Herons can bring about a lot of trouble as well.
- When faced with many spread turrets on Ravens , the best strategy is to go on the side of the field where the Raven turret mount is either not a cone laser, or of a lower tier of cone laser.
- This maximizes the amount of breathing space you have if you do not have any form of laser defence.
- Especially Ravens
- Interestingly, Tracking Lasers are less annoying.
- The general tactic for tracking lasers is to lure them to one side of the field, and then quickly strafe to the other side of the field (or less, such as to the center of the field if the tracking is slow).
- T1 turrets are only of some threat unless they are of high Mk which track you quite fast.
- Otherwise, they are easy to deal with and you generally need not care about eliminating these turrets fast.
- T4 tracking lasers on the other hand, often track fast and are almost always the first priority of elimination.
- T3 tracking lasers are the most special cases.
- You can in fact, sit completely still and survive.
- This is because the spacing between lasers are just enough to go through your ship core.
- However, be careful of Ravens equipped with these T3 lasers, as their rapid movement can throw their perfect lock-on off and kill you instead.
- Generally, do not use this technique for Ravens with T3 lasers at the front of the wave, but those at the back of the wave are generally fine unless they are of low Mk, which is obvious since they track very slowly.
- Generally, do not use this technique for Ravens
- For Herons and above, it is generally fine to sit still.
- In fact, for Herons with high Mk T3 lasers, or Vultures and above with such T3 lasers, you can still inch your way, albeit very slowly, to avoid other bullets such as pellets or darts.
- This technique is very useful especially against high Mk T3 lasers which are very difficult to avoid by making a last minute strafes.
- It is also very useful against Condors
 and Rocs
  , where particles are scarce, and using this technique allows for massive grazing and thus refills your Aura quickly.
 - Here's a demo of staying calm while the T3 lasers simply go past your ship core:
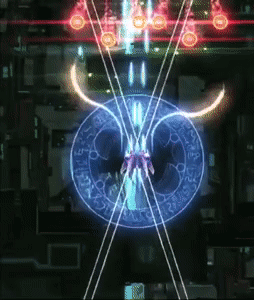
- In fact, for Herons
- Personal Shield is obviously the best defence against lasers, as you can simply sit still just before the lasers are about to fire and the Invaders will start to kill themselves from the Laser Reflection
 of Personal Shield Ultimate .
 - Teleport also allows you to get away before the lasers fire to a safe corner and need not contend with all the other bullets on field.
- However, when the field has many different laser tracking turrets of different Mks, Teleport starts to suffer against dealing with the different firing times of the tracking after the initial laser burst.
- However, when the field has many different laser tracking turrets of different Mks, Teleport
- Bullet EMP may not be the most ideal defence, but can help to reset lasers, usually useful after the first burst of lasers where lasers start to fire off sync.
- It should of course, be still used in the first burst of lasers if you are unable to strafe.
- The reset
 Ultimate helps to buy you some time, however, it will not last for long.
- Point Defence cannot deal directly against lasers, but still helps when you are strafing to avoid lasers
- Be careful to not strafe too fast as Point Defence can't clear so many bullets at once.
- Be careful to not strafe too fast as Point Defence
- Barriers are generally a bad defence against lasers as barriers take increased damage against lasers, so they don't last very long.
- Furthermore, the Fade Out of barriers is unreliable in protecting you from lasers.
- However, the smallest barriers will always last against one full burst of lasers if deployed right before the lasers fire, which can work in your favor at times.
- Furthermore, the Fade Out of barriers
- Phalanx is horrible against lasers as they break near instantly and there is not enough response time to deploy a new Phalanx, resulting in you spamming Phalanxes and thus wasting many of its charges.
Speed Lasers
- The general strategy against speed lasers is to try and synchronize them as much as possible.
- Desynchronized speed lasers are the worst, just like how triggering laser MIRVs
 one by one will result in disaster.
 - The preference would be start from the middle of the field to attract all the T2 / T3 & T4 speed lasers to fire at you at almost the same time.
- If it's not possible to be in the middle of the field, the best way to do this would be to move quickly from left to right of the field, or vice versa.
- Desynchronized speed lasers are the worst, just like how triggering laser MIRVs
- From here on, try your best to stay downfield, within the bottom 1/3 of the field as some speed lasers may not trigger properly.
- This is unless you are sure you want to camp on that upfield corner for at least quite a while (approx 5s or above), which can benefit some auto aiming ships.
- Ironically, T1 speed lasers can sometimes be more dangerous than T2, T3 or T4 speed lasers.
- This is because they take a while before they peekaboo and fire the speed lasers at you.
- Given that speed laser lines don't show up until 1s before firing, it's very hard to determine when all the T1 speed lasers will trigger.
- To deal against these T1 speed lasers, similarly, stay as downfield as possible and keep off the left / right edges of the field to maximize the chances all the T1 speed lasers will trigger.
- When dealing with a mix of T1 and other tier (T2 / T3 / T4) speed lasers, prioritize dodging the other tier lasers first.
- Then, it's usually down to quick reflexes on how to quickly dodge T1 speed lasers.
- Because T1 & T2 speed lasers are only 1 laser line, it is quite easy to simply offset slightly from where they are going to fire to dodge.
- Unlike dodging darts, offset about at least 4-5 ship core length to the left or right, since Invaders still can freely move around while firing the speed lasers (although the speed lasers themselves are locked in place).
- The same strategy also applies for T3 and T4 speed laser turrets, especially beyond the first round of speed laser firing.
- Of course, you'll need to offset more for higher tier speed lasers.
- All in all, move swiftly in subsequent rounds of speed lasers to dodge them.
- By swiftly, the speed of your movement should be about slightly more than half of the maximum allowed speed.
- For reference, strafing left to right when dodging boomerangs is around maximum speed already, so just use a speed slightly more than half of that.
- Due to the threat of so many other bullets around, it is usually easier to strafe quickly to one side to avoid all the speed lasers, crossing at least half the horizontal field space.
- There are also T1 speed lasers that only face vertically downwards, and are equipped on Herons and Sparrows .
- These lasers are literally the easiest type of lasers to deal with due to the fact the Invader stops moving, and the laser lasts a short while.
- Despite this, don't be overconfident, and always head to a column of space where you have at least 3-4 normal ship's width worth of horizontal space, so you can still dodge other bullets.
- Note that while it is possible to survive a T3 or T4 speed laser by standing still, the chances of this is very low due to Invader RNG movement. Here's the illustration of it, although i highly recommend you don't try it.
- Against a T4 speed laser, when left with absolutely no choice, it is possible to dodge a T4 speed laser due to the way a T4 speed laser works.
- The right laser fires first, then the left laser, and finally, the middle laser.
- This means that it is possible to stay on the left laser first, and then inch yourself towards the middle laser.
- After the right laser fires finish, as the left laser fires, move right to move past the middle laser.
- This method is seldom reliable, however, since Invader movement makes precise inching difficult.
- Also, it is actually difficult to estimate when is a speed laser no longer dangerous after firing, which makes moving right past the middle laser and into the right laser difficult since you might die by the right laser even when you think the right laser is no longer dangerous.
- If you get very very lucky however, you just might be able to survive a T4 speed laser by doing this.
- Always aim to eliminate speed lasers first, especially T2 and higher speed lasers.
- Eliminate them by pairs if possible, so for example, eliminate the T3 speed lasers first, then the T2 speed lasers.
- If there are more than 4 speed lasers of T2 and higher, however, then it is usually a better idea to eliminate other more dangerous turrets first.
- Don't try to graze speed lasers because it is extremely hard like normal lasers.
- In speedrunning, if the mission is speed laser infested, it is a good idea to go upfield and avoid the speed lasers being able to aim at you accurately.
- You should be at the least, at the 2/3 height of the field.
- Of course, the more upfield you are, the safer you'll be.
- Such a technique is advantageous in the sense that you will also be nearer to Invaders, thus minimizing travel time of damage means like your main weapon.
- This can be very difficult especially for Mega Bomb ships that rely on getting centerline Mega Bomb setups, but the risk is generally not worth it.
- This usually means charging all the way upfield since at 2/3 height, you'll likely run the risk of turret collision.
- Personal Shield is only an adequate defence against speed lasers due to how quickly they reload and fire again, so Personal Shield only works effective against the first round of speed lasers.
- Bullet EMP is actually a good defence, since it clears out bullets so that you can strafe properly.
- Between the reload times of speed lasers, try not to have Bullet EMP cover speed lasers since they will just fire again.
- If they are about to fire again however, using a Bullet EMP can save you.
- Just take note that as the name implies, you might die by the speed laser before the Bullet EMP Aura expands to reset it.
- So try to fire it slightly earlier, as soon as you hear the charging sound of the first speed laser.
- Between the reload times of speed lasers, try not to have Bullet EMP
- Barriers work very well against speed lasers as well, since speed lasers do significantly less damage than normal lasers, so they last quite well against them.
- Phalanxes , likewise, do fairly well, although not as well since they need to be replaced before they break otherwise you will die.
- Thankfully, most of the time, only 1 or 2 Phalanxes are required to deal against a full round of speed lasers.
- Thankfully, most of the time, only 1 or 2 Phalanxes
- On the other hand however, the Barrier and Phalanx Reflector apexes are excellent defences against speed lasers.
- Since speed lasers do little damage to barriers and Phalanxes , they are quite resilient against speed lasers.
- Also, since they last quite well against speed lasers, you can continually deploy Barriers and Phalanxes to simply negate their presence and keep dealing damage back to the Invaders.
- This makes speed lasers trivial on Barrier Reflector apexes, while being quite easy on Phalanx Reflector apexes.
- Since speed lasers do little damage to barriers
Here is a close-up animation of a normal laser firing, even though it looks to be using the graphics of a speed laser:
Trivia: Here's an early version of the speed lasers on the left, which has since been retired. Note the similarities to Razor VI's Phrase Disruptor in the right picture, which also shows how the current speed lasers look like.
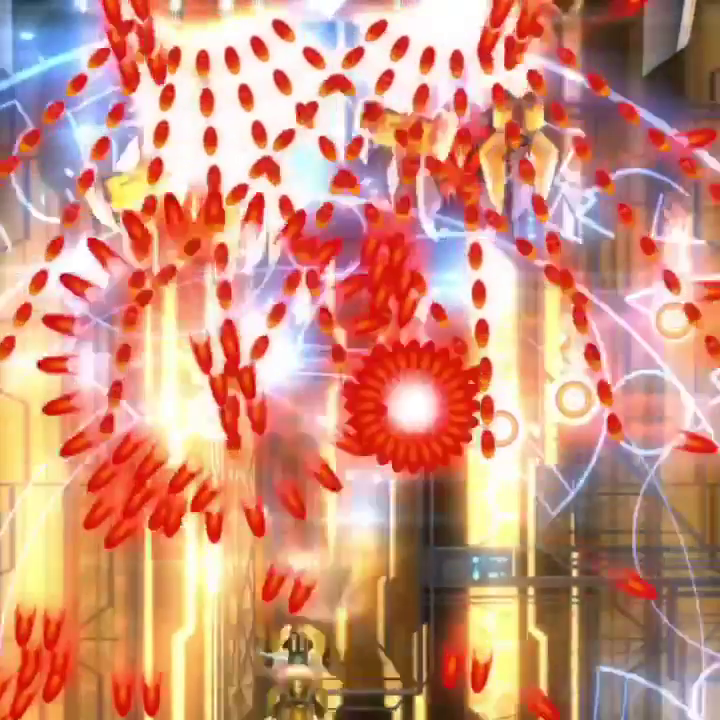
MIRVs
There are 4 types of MIRV turrets: launchers, spreads, bloomers and Doomsday Super MIRVs ![]() . There are also 2 types of MIRVs, pellet MIRVs
. There are also 2 types of MIRVs, pellet MIRVs ![]() and laser MIRVs
and laser MIRVs ![]() . Laser MIRVs have 2 tiers as well, I will refer T1 laser MIRVs as those that fire off 5 lasers, and T2 laser MIRVs as those that fire off 9 lasers (assuming each laser starts from the point of MIRV explosion).
. Laser MIRVs have 2 tiers as well, I will refer T1 laser MIRVs as those that fire off 5 lasers, and T2 laser MIRVs as those that fire off 9 lasers (assuming each laser starts from the point of MIRV explosion).
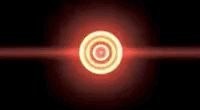

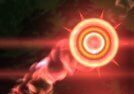
Above, on the left, you can how a pellet MIRV ![]() looks like. Above, in the middle is how a T1 laser MIRV
looks like. Above, in the middle is how a T1 laser MIRV ![]() would look like. Note how it has 5 spikes on it. Above, on the right, you can see how a T2 laser MIRV
would look like. Note how it has 5 spikes on it. Above, on the right, you can see how a T2 laser MIRV ![]() would look like, note how it has 9 spikes on it.
would look like, note how it has 9 spikes on it.
Below, on the left, you can see a pellet MIRV exploding. On the right, you can see an (old) T2 laser MIRV exploding. NB: Can you identify the ship used on the left side based on the main weapon? Hint: It's a blue laser with a short burst. The answer is Mirage.
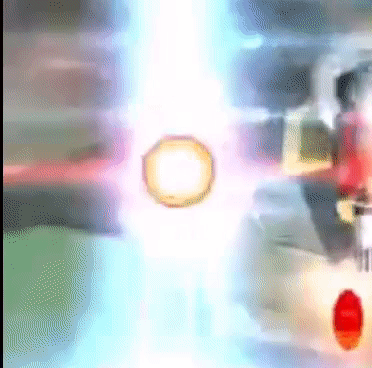
Note that you can die by the MIRV projectile itself. The hitbox for an MIRV, both pellet and laser, is the white region enclosed by the 2 rings, the outer darker yellow ring and the inner yellow ring. The center of your ship's core can be on top of the 2 rings and you'll survive just fine.
Pellet MIRVs
- Pellet MIRVs are regarded as the most annoying in this game.
- This is because pellets are released in all directions, and multiple MIRVs exploding means pellets start to become shurikens - it becomes difficult to quickly determine where each pellet is going with so many bullets on screen.
- With 30 pellets being released in all directions, the screen quickly becomes flooded with bullets even with just a few MIRV explosions.
- Another annoying part about MIRVs is they are 2 stage bullets, and they are deadly in both stages (yes, you can die from colliding with an MIRV directly, even without it exploding), before exploding and after exploding.
- Before exploding, they are menace on the field and pose a fear in many players, even among veterans.
- As they only explode when you are within a certain threshold distance of them, it is sometimes scary because you can sometimes not know exactly when they are going to explode.
- After exploding, the pellet mess and bullet flooding makes MIRVs a gigantic pain to deal with.
- The general strategy for pellet MIRVs is to approach them as early as possible.
- This allows the pellets released from the MIRVs to spread out and thus be easier to dodge between pellets from the MIRV itself, as well as other pellets released from other MIRVs and just all the other bullets around.
- For MIRV Bloomers, the same also applies.
- However, even as I say to approach them as early as possible, do not stand point blank in front of an MIRV Launcher, Spread or Bloomers as MIRVs need a short time after being produced before they are ready to explode.
- The other technique is to mass activate MIRVs in batches.
- This allows for a push forward then retreat strategy, where the push forward activates them all.
- Then, retreat to dodge through the pellets.
- This applies to all types of MIRV turrets, particularly for bloomers where many new players get scared off by the sheer amount of MIRVs that get released.
- To train this technique, try to mass activate as many of these pellet MIRVs as possible without standing too near to the MIRV turrets themselves.
- Then, as you get used to this technique, with more and more practice, you will slowly start adjusting yourself to roughly how many pellet MIRVs you should mass activate.
- Remember, while mass activating MIRVs is a good idea, activating much more than you can swallow is also a very bad idea since it'll become significantly more difficult to dodge through the released pellets.
- It's always safe to activate slightly more MIRVs than to activate less, as there are less waves of pellets that you need to dodge through.
- You do not want a situation where you did not activate enough MIRVs and need to activate more later from the same wave of incoming pellet MIRVs.
- For MIRV Spreads, a good idea is to activate them all at the same time. This is possible since MIRVs from MIRV Spreads take 0.5s to be primed before they can be triggered to explode. The pattern produced by the released pellets in this fashion is predictable and easier to dodge. If this is not possible, a left to right (or vice versa) is also possible, as the pattern produced by the released pellets in this fashion make a rather large hole in one of the spacing between 2 pellets when done right.
- Teleport is a great defence against pellet MIRVs.
- For MIRV Launchers/Spreads, simply Teleport right onto the MIRVs to delete them.
- For MIRV Spreads, you do not need to worry about the initial time before the MIRVs become ready to explode, just teleport right after they are released.
- For MIRV Bloomers, employ the same push forward then retreat strategy, except that you don't push forward, you instead teleport forward to the MIRV wavefront to delete as many MIRVs as possible before retreating.
- For MIRV Launchers/Spreads, simply Teleport
- Bullet EMP is excellent against MIRVs since it completely disregards how many bullets are there on screen.
- Whether the MIRV is exploded or not, it will get eliminated anyway.
- Even the smallest Bullet EMPs can get you out of a mess of pellets released by MIRVs.
- Barrier is an adequate defence against MIRVs.
- You can deploy barriers in such a way that the MIRVs are outside the outer edge of the barriers, so that they hit the barrier and you are safe inside the barrier.
- However, bear in mind MIRVs cause more damage to barriers than normal bullets, so it will not last long.
- You should also be deploying small barrier , and not large ones.
- Otherwise, you are not taking advantage of the Barrier's Fade Out time that are still able to block off MIRVs.
- This works well in Shuriken/MIRV missions as all the bullets are roughly the same speed.
- In other mission types, there are other bullets of different speeds in that barriers are less effective in blocking out MIRVs alone.
- You can deploy barriers
- While it sounds like Point Defence is a good defence against MIRVs on paper due to its MIRV Defense
 Ultimate that deletes MIRVs with only one Point Defence laser, the fact is, there are so many other bullets around MIRVs
- Every other type of bullets also travels faster than MIRVs, even shurikens.
- It becomes very difficult to use Point Defence against MIRVs.
- However, there are times when the field is mostly clear of bullets except a few remaining bullets, where Point Defence becomes very helpful and triumphs all other defensive options.
- This happens mostly when there is a Vulture right in front of you (whether is it a frontline Vulture or the only surviving Invader on field left) which has only MIRV turrets, which is a rare occurrence.
- Phalanxes work quite well against MIRVs as you can clear off entire clusters of MIRVs and delete quite a lot of the pellets released from other pellet MIRVs.
- When speedrunning, pellet MIRVs are some of the worst Invader weaponry to deal against.
- For basic speedrunning techniques, not much optimizations can be done except to apply the above survival techniques.
- On a more advanced level, recall that an MIRV takes 0.5s after they are first emitted.
- While you cannot graze the MIRV itself, you can graze the pellets released by the MIRVs themselves.
- As the bullets from an MIRV are emitted from the point of explosion, it is possible to graze all of the 30 pellets released.
- However, this requires a lot of practice to know the time to quickly back off just as the pellets are released from the MIRV.
- Against MIRV Bloomers, you can also retreat just as the MIRVs from the MIRV Bloomers are primed, such that you can graze of pellets from multiple MIRVs, which can refill even counter based on Auras very quickly.
Here is a close-up animation of a T4 MIRV Bloomer charging, firing and then going into cooldown:
Laser MIRVs
- For laser MIRVs, the same strategy also applies as pellet MIRVs .
- The mass activation of laser MIRVs is even more important as activating MIRVs one by one is equivalent to having many off sync lasers which will make dodging of tracking lasers (together with other bullets) even more difficult.
- However, since there is a delay time between the laser MIRV exploding and the lasers actually being active (turning red), you should be even more brave and try to clear the entire field of laser MIRVs, even while some of the MIRVs are already activated/exploded.
- Just be quick to find a safe spot to hide in after activating them all.
- Unlike pellet MIRVs, there are very little good defensive options against laser MIRVs.
- Dodging between their emitted lasers is usually sufficient.
- It is near impossible to eliminate the lasers emitted by laser MIRVs by Teleport-ing on top of them as you must be extremely precise.
- Barriers work, but be very careful not to activate them otherwise they will deal enormous damage to your barrier, which can be very difficult if you have a small barrier.
- Furthermore, if you are deploying a large barrier , you should be taking advantage of the inner lining, which can be done at the start of a wave and only lasts so long.
- Furthermore, if you are deploying a large barrier
- Point Defence continues to suffer the same problem stated previously, since they also need to eliminate other bullets first.
- On some laser heavy missions, there aren't a lot of other bullets around, which makes Point Defence quite usable.
- However, Point Defence by itself isn't ideal against lasers anyway.
- On some laser heavy missions, there aren't a lot of other bullets around, which makes Point Defence
- Phalanxes are also weak and break easily against lasers of laser MIRVs.
- Not to mention, trying to shovel can cause you to die because Phalanx isn't 360° protection.
- Not to mention, trying to shovel can cause you to die because Phalanx
- By mass activating laser MIRVs, it is possible to graze off the laser lines.
- The moment where a graze is recognized is when the white pulse zips past your ship's core.
- Thus, you can mass activate the laser MIRVs and find the smallest possible safe spot.
- In the case of laser MIRV Bloomers, if you manage to mass activate all its laser MIRVs, there is a blind safe spot in the middle that is large enough for you to comfortably fit in.
- This is mostly applicable to laser MIRV Bloomers on Eagles , since it is difficult to Invader ride on a Vulture that has other turrets while you can down the middle turret for Eagles quite fast.
- Be careful however, as laser MIRVs themselves still can kill you. It is usually possible to find a very small safe spot between MIRV Bloomers. For Rocs, it is shown in the below screenshot.
Trivia: Aside from laser and pellet MIRVs, there was apparently supposed to be a dart MIRV as well, which fired 24 singular darts in all directions. However, it never got past the testing stage. Below shows how it looked like, but you can also see it in action here:
https://www.instagram.com/p/BRqW09UFNJP/
Caged MIRVs 
The leftmost picture shows how it looks like on an Unprotected ![]() Sparrow
Sparrow ![]() , the middle picture shows it on a Shielded
, the middle picture shows it on a Shielded ![]() Sparrow while the rightmost picture shows how it looks like on an Armored
Sparrow while the rightmost picture shows how it looks like on an Armored ![]() Sparrow.
Sparrow.
Caged MIRVs do not appear on Sinister Shielded ![]() or Sinister Armored
or Sinister Armored ![]() Sparrows
Sparrows ![]() .
.
- Despite behaving similar to an MIRV , it should not be treated as the same way as an MIRV, thus the strategies for MIRVs are not as relevant for Caged MIRVs.
- The difference between an MIRV and an Caged MIRV is that you are largely unable to control the detonation time and thus, Caged MIRVs may not activate as early as you desire.
- It is easy for one to say to kill these Sparrows equipped with Caged MIRVs as quickly as possible.
- However, given the rapid movement of Sparrows , and how Sparrows can hide behind other Invaders (including other Sparrows), it is not an easy task.
- However, given the rapid movement of Sparrows
- Generally, an Aura or Zen that does both damage and provides bullet clearance render Caged MIRVs non-existent, as the Sparrows would be destroyed and the released pellets from Caged MIRVs would be simultaneously eliminated.
- This renders Reflex EMP the best option against these Sparrows .
- However, while it seems straightforward to simply throw yourself into the thick of the action to release an Reflex EMP , you have to be careful of what is the next wave.
- Reflex EMP has a long cooldown time and finishing off the current wave with these Sparrows too quickly will pose a problem if the next wave is dense wave, which is ideal for another Reflex EMP.
- Thus, it is important to plan which waves to use Reflex EMP and which waves to not use Reflex EMP.
- Prioritize using Reflex EMP on waves with more Sparrows .
- However, when speedrunning, you want to try and use them on the densest wave possible.
- In many cases, it is better to use your main weapon
 or an Aura to eliminate the Sparrows in 1-1, and then use Reflex EMP in the next wave if it also contains Sparrows so that you can simultaneously eliminate the pellets from Caged MIRVs in 1-1, and negate pellets from Caged MIRVs in 1-2.
- If 1-2 doesn't contain Sparrows , then use Reflex EMP on 1-1.
- If 1-2 doesn't contain Sparrows
- Prioritize using Reflex EMP
- A Destructive Bullet EMP also works in the same way and does not suffer the same problem as Reflex EMP
- Since Bullet EMP is quick to refill, it is the best strategy against Caged MIRVs.
- Since Bullet EMP
- Using Mega Laser to eliminate these Sparrows since it is a pure waste of damage.
- However, it could be useful in Wave 1 of a new Act, which causes less pressure on later waves of the Act.
- Always prioritize damage instead of bullet clearing from Mega Laser .
- This renders Reflex EMP
- The next best solution is Point Defence .
- Using Point Defence does not deplete the Aura completely, which is vital unless you have a means of AoE damage.
- Without a form of AoE damage, the Caged MIRVs will go off a few by few at a time, making one-time Aura usage such as Bullet EMP (without Destructive Wave) less useful.
- On the contrary, Point Defence can still keep up with eliminating wave after wave of pellets released by Caged MIRVs.
- Using Point Defence
- Vorpal Lance is sometimes able to completely eliminate pellets from some of the Caged MIRVs if aimed right, but most of the time one side of pellets will still leak.
- Twin Lance has a higher chance to eliminate more pellets, but don't rely on Vorpal Lance .
- Can be used to cut through the pellets released by Caged MIRVs by utilizing Vorpal Wake , following the Vorpal Lance as it fires forward.
- However, using Vorpal Lance against Sparrows is a very bad idea as it wastes the damage potential of Vorpal Lances.
- Twin Lance has a higher chance to eliminate more pellets, but don't rely on Vorpal Lance
- Another semi-effective solution is to use Personal Shield .
- If the next wave does not feature a lot of lasers , you can activate Personal Shield and then use the Fade Out time to cut through these pellets so that you can clear a good amount of these annoying randomly scattered pellets.
- If the next wave does not feature a lot of lasers
- The Aura with the biggest problem would be Stun EMP , as it destroys these Sparrows all at once and creates an ultimate mess on the field.
- For the sake of survival, carefully launch Stun EMP at the very corner of the screen so that you would still leave 1-2 Sparrows alive.
- Basically, your aim is to disperse the pellets released such that at least the center field is clear of bullets.
- This can also be applied to some level of basic speedrunning, but not for advanced speedrunning.
- For the sake of survival, carefully launch Stun EMP
- It is possible to graze off pellets from a Caged MIRV, but this is a skill that should only be attempted by the most veteran speedrunners which are looking for the extra edge.
- It is terribly difficult to do so, since it is also difficult to determine when a Caged MIRV goes off.
- Focus on grazing off only one Caged MIRV as any more than that is insanely hard.
- You can try to graze off 2, but if you have to really know what you are doing.
- Otherwise, the best advice would be to stay a distance away from these Sparrows .
- In a wave with a Roc , it is usually ok to mass eliminate all the Sparrows at once using some form of AoE damage.
- The welcoming party can feature a varying amount of Sparrows , from many to very little.
- Note that after that, you will need to navigate through these released pellets.
- This can be very difficult for ships with Mega Laser especially when the welcoming party is dense with Sparrows .
- When using an AoE form of damage without a form of bullet clear, try not to charge Mega Laser upfield as dodging the pellets released from on top is extremely difficult, compared to when you use it downfield.
- This can be very difficult for ships with Mega Laser
- The welcoming party can feature a varying amount of Sparrows
Doomsday Laser 
Doomsday Lasers only appear on Vultures ![]() , Condors
, Condors ![]() and Rocs
and Rocs ![]() . Doomsday Lasers blast a Nightfury wide laser vertically downwards. Here's the animation of a Doomsday Laser as it charges up, fires and finally cools down:
. Doomsday Lasers blast a Nightfury wide laser vertically downwards. Here's the animation of a Doomsday Laser as it charges up, fires and finally cools down:
- Doomsday Lasers obliterates Phalanxes and Barriers very quickly, rendering them useless.
- The Fade Out time of both of these Auras are almost completely negated.
- A Barrier Reflector or Phalanx Reflector apex will reflect the parts of the Doomsday Laser it hits
- However, the barrier and the reflection will also only last a split second.
- In the video below, you can see how devastating the Doomsday Laser is on barriers , obliterating tons of barriers in one shot.
- However, the barrier
- The Fade Out time of both of these Auras
- A Chrono Field renders you completely invincible even against Doomsday Lasers.
- You just have to deploy Chrono Field before the Doomsday Laser fires if you are under the danger zone.
- Only the audio cue where Doomsday Laser is charging up is able to tell you to the best accuracy.
- It is also possible to look at the charging stripe running down the Doomsday Laser turret but it's just difficult to track in a bullet hell.
- There is enough time to Chrono Hop across a Doomsday Laser being fired if your Chrono Field was previously deployed not under the danger zone.
- You just have to deploy Chrono Field
- Deploying Personal Shield before Doomsday Laser fires also allows you to reflect a Doomsday Laser.
- A Doomsday Laser is considered to consist of 5 individual downward firing lasers, although a typical sized Personal Shield would reflect a maximum of 3 such lasers.
- A Supersized Personal Shield can reflect 5 lasers if positioned correctly.
- A Supersized Personal Shield
- It is possible to super reflect a Doomsday Laser just like normal lasers and deal respectable damage, it's best to reserve a super reflect for normal lasers which are in larger quantities than a miserable 3 lasers.
- Doomsday Lasers have a much longer charge up time, making Doomsday Lasers fire much later than other lasers.
- So unless Doomsday Laser is the only laser on field, there is usually no point to super reflect a Doomsday Laser.
- A Doomsday Laser is considered to consist of 5 individual downward firing lasers, although a typical sized Personal Shield
- Stun EMP also works very well against Doomsday Lasers due to how far reaching Stun EMP is with its huge radius.
- The smallest Stun EMP will reset the entire Doomsday Laser's lengthy cycle which renders it pretty much useless.
- The smallest Stun EMP
- Bullet EMP also works to reset Doomsday Lasers.
- Because Barriers and Phalanx get obliterated in a split second, they are of no use against Doomsday Lasers.
- If you have a Phalanx , stay completely clear of the Doomsday Laser.
- Even with the Reflective Barrier apex, the barrier will get obliterated with the barrier only reflecting for a split second, hardly dealing any damage.
- If you eliminate all the Doomsday Lasers before they can fire however, it is ideal to deploy barrier upfield to block other bullets and lasers .
- Otherwise, deploy small downfield barriers around yourself where the Doomsday Laser is unable to hit.
- Otherwise, deploy small downfield barriers
- If you have a Phalanx
- As the action of Doomsday Laser is too sudden, Teleport is a very bad option to do a last minute escape from a Doomsday Laser.
- If you are in the danger zone of Doomsday Laser and you hear the Doomsday Laser charging sound, move away instead of Teleport-ing away because your reaction time coupled with the charging time of Teleport is insufficient to escape a Doomsday Laser.
- However, Teleport is a good way to get across the Doomsday Laser in the case you are cornered and your escape route is blocked off by Doomsday Laser.
- If you are in the danger zone of Doomsday Laser and you hear the Doomsday Laser charging sound, move away instead of Teleport-ing
- If you have none of the defensive options mentioned above, stay completely clear of Doomsday Lasers once you are aware of it as the wave arrives.
- Don't get close to it as the Doomsday Laser can catch you off guard very quickly even when you are thinking of avoiding it at last minute.
- Don't rely on sound cues, because it doesn't always happen due to the multitude of other sounds.
- Doomsday Lasers are extremely deadly to survival as it severely limits your left and right movement on the field, a vital move when you need to inch around the field when the bullet density is very high.
- Combined with boomerangs , the combination can be very deadly. Doomsday Lasers also last quite a while, restricting your movement in that time span, making it all the more worse.
- It is recommended you pop off Doomsday Lasers if you see more than one Doomsday Lasers on field.
- If you have Chrono Field , well, just do whatever you like, because Doomsday Laser doesn't do anything to you.
- You can go about popping off other dangerous turrets instead since Chrono Hopping will always save you.
- Or you can simply graze off a couple of bullets to gain back a reasonable Chrono Field size to counter the next Doomsday Laser.
- If there are no bullets to graze...what are you even doing at the bottom of the field? Just go above the Doomsday Lasers.
- If you have a Personal Shield coupled with Chrono Field , Bullet EMP or Stun EMP (or Missile Swarm
 Ion Warheads), you can use them in alternate Doomsday Laser bursts.
 - If it's Stun EMP and it's a dense wave...have fun keeping the Doomsday Lasers stunned for eternity.
- If not, you will need to pop off the Doomsday Lasers on one side of the screen.
- Vultures with a Doomsday Laser, coupled with a heavy and/or dense wave can also be very deadly since the Doomsday Laser cuts off a significant part of the middle column.
- Depending on the turret composition, if they are not many other bullets on screen, you can simply camp on the other side of the Doomsday Laser where you will have more space.
- Otherwise, if there are deadly spinners, you should work to eliminate the spinners on your side of the field and not the Doomsday Laser, as it is difficult to track when it fires.
- If the Doomsday Laser is on a frontline Vulture , go ahead and pop the Doomsday Laser. Otherwise, it would not be a good idea.
- If you have Vorpal Lance , however, it can be a very quick solution to destroy spinners even on the side of the Doomsday Laser.
- You can even use Vorpal Lances to line them up against Doomsday Lasers if the wave is dense enough, but always prioritize spinners first.
- You can even use Vorpal Lances
- An interesting thing about Doomsday Laser is it can be "delayed" slightly by the Nightfury
 , since Nightfury will neutralize the Doomsday Laser.
- However, since Doomsday Laser lasts much longer than a Nightfury , you will still get killed unless you move out of the way as Nightfury fires.
- Using the Nightfury to neutralize a Doomsday Laser is a very bad idea since you will waste all if not most of the 300 damage of the Nightfury.
- This feature is simply included for fun as stated by the devs, and is not a viable strategy.
- This feature was added in v5.0.3 as a fun feature.
- The left GIF shows how the attempted but failed battle between the Doomsday Laser and Nightfury (before the v5.0.3 update) while the right GIF shows the actual epic battle between the Doomsday Laser and Nightfury (after the v5.0.3 update). The rightmost picture is an awesome screen grab when the Nightfury and the Doomsday Laser battles it out.

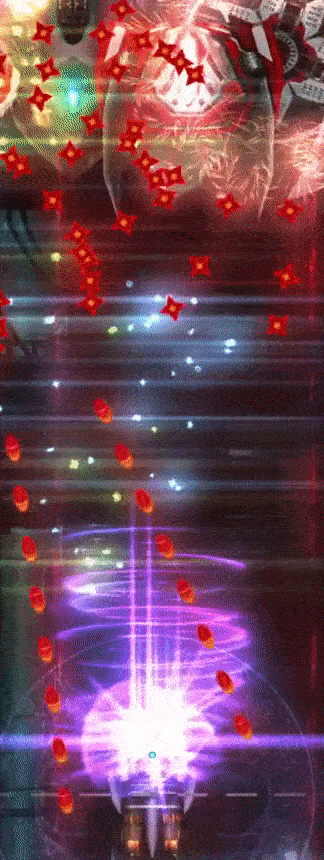
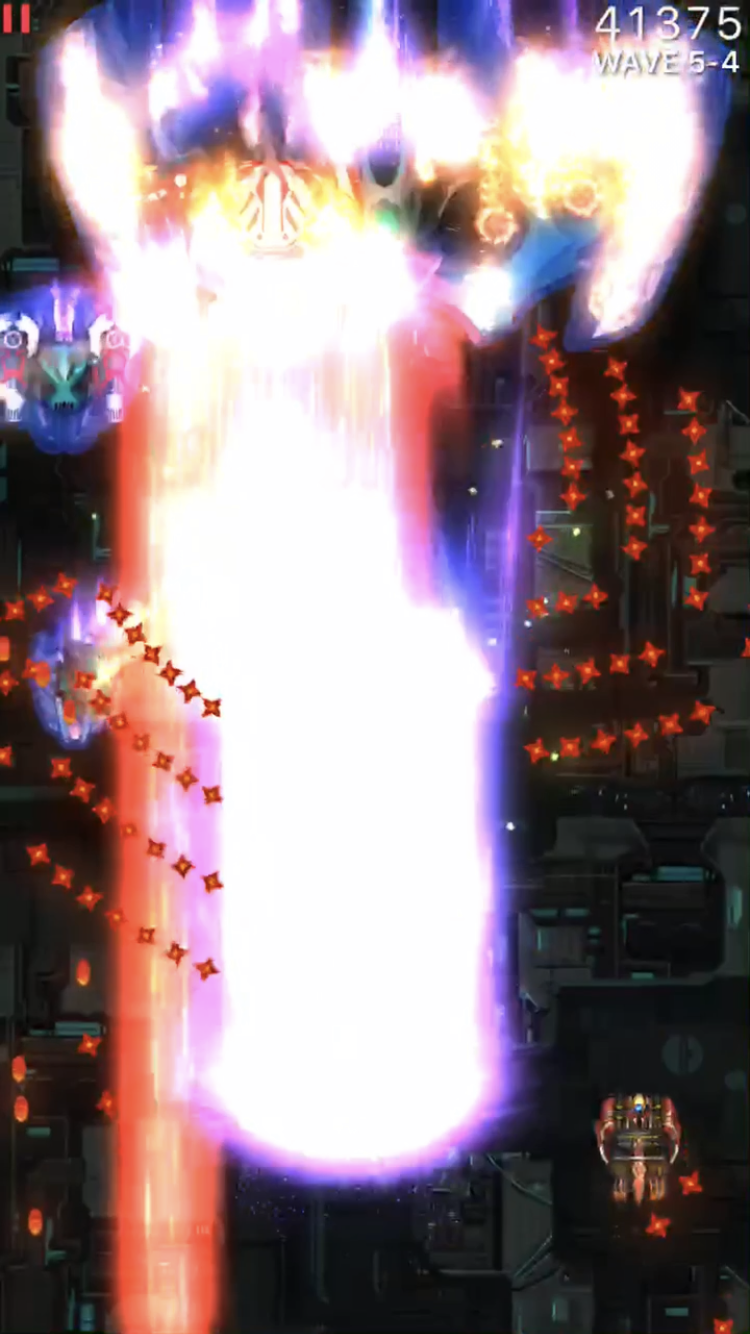
- However, since Doomsday Laser lasts much longer than a Nightfury
Trivia 1: The devs had a bit of fun and made a test version of a tracking Doomsday Laser. Obviously, it will not be implemented in-game, but here's how it looked like:
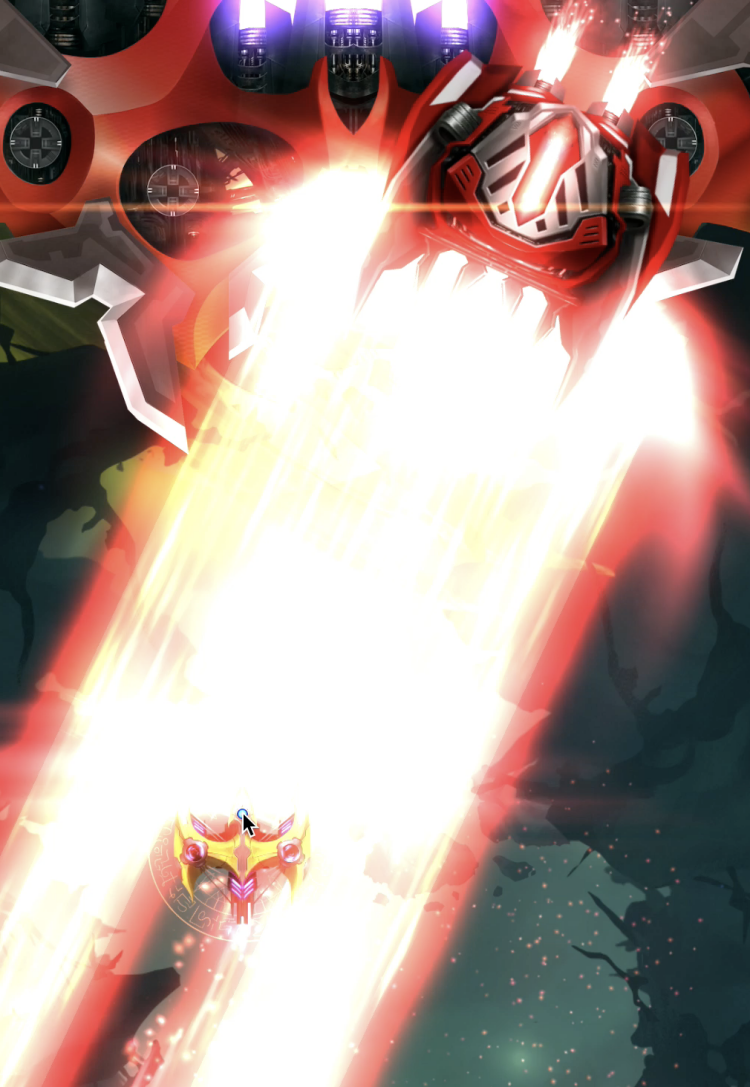
Trivia 2: Doomsday Lasers used to be MUCH louder (and with more BASS). Rocs could have the ENTIRE front row of 6 turrets as 6 Doomsday Lasers. This obviously meant that any ship that didn't had some form of stun or defence will die an inescapable death. Watch the short clip below to experience the madness. WARNING! The sound of 6 Doomsday Lasers can be VERY LOUD. Be sure to turn your volume down first adjust upwards later.
Trivia 3: Here's also a screengrab of a scary instance where Doomsday Lasers covered the whole screen and was accompanied by other dangerous turrets. These were back in the early days when Doomsday weapons were first introduced, so you will not see these kind of scenarios anymore.
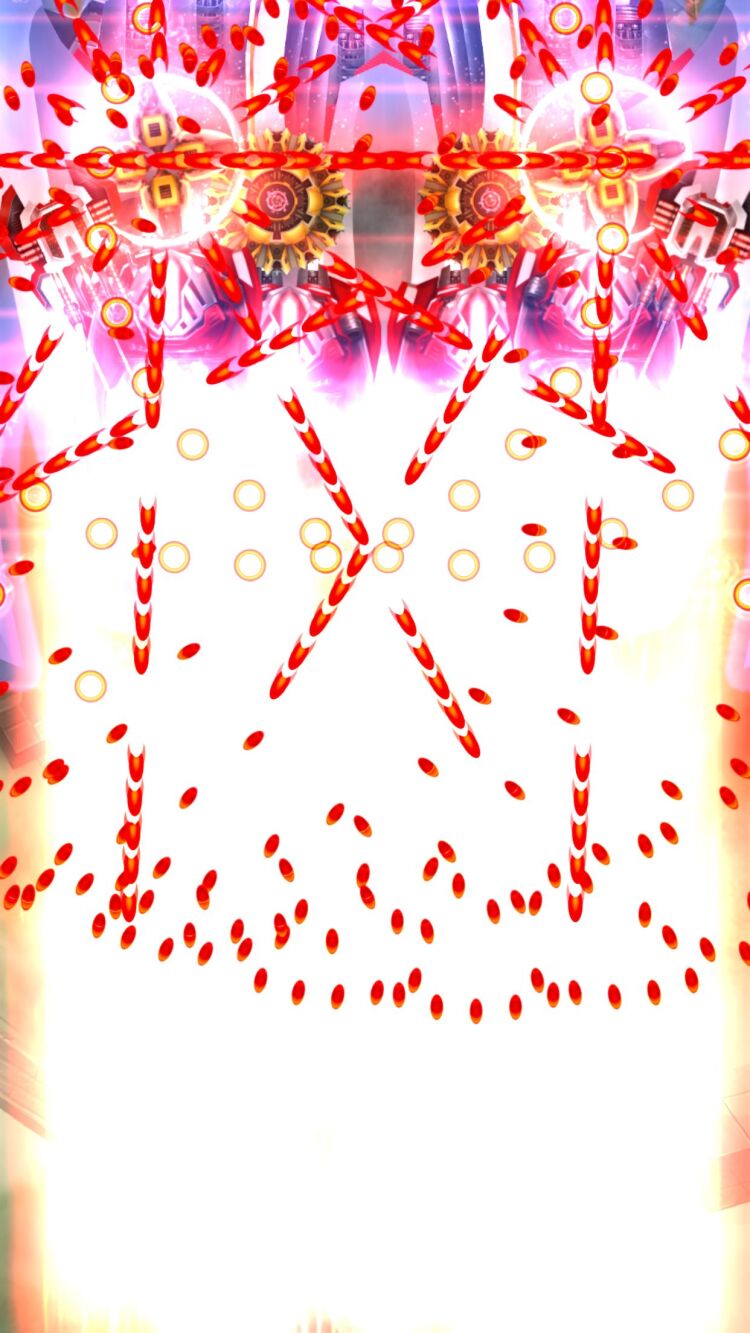
Doomsday Bomb 
Doomsday Bombs completely obliterates Barriers in an instant so they will not protect you at all. As long as you ship's core is in the radius, you are dead no matter how many barriers you place. Here's a Doomsday Bomb as it charges up and then cools down after releasing the shockwave:
And here's a screengrab of the terrifying shockwave that is sent out by Doomsday Bomb:
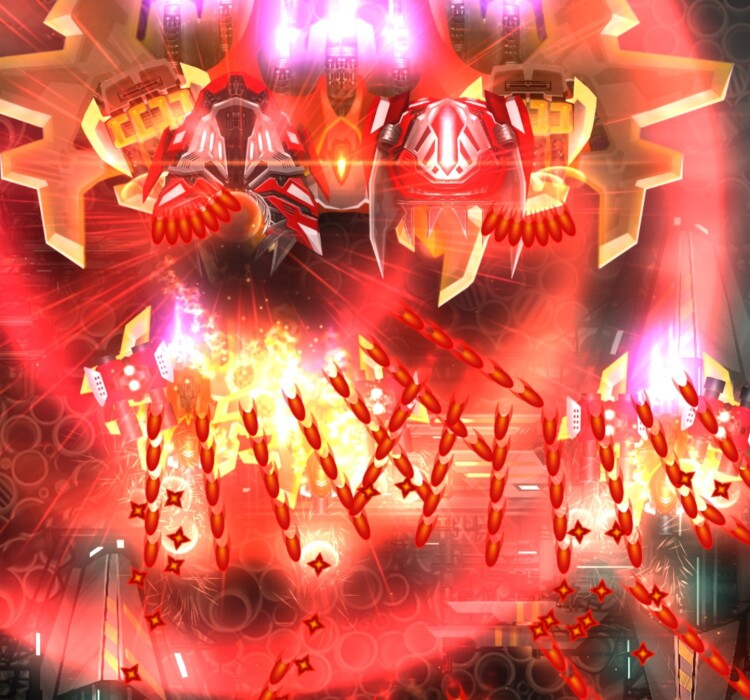
- Despite its scary name, the Doomsday Bomb is seldom very threatening in the context of survival.
- The only times when it is very threatening is when 2 Doomsday Bombs are on a frontline Vulture , or if more than one are on the front row of turrets on a Condor or Roc that spawns slightly further in front (a Roc spawns further in front when the welcoming party does not take up the upper half of the screen).
- The other time where Doomsday Bomb may be threatening is when you are trapped between lanes of bullets emitted by spread turrets.
- However, you are more likely to die from the bullets coming in front of you instead of from the Doomsday Bomb itself since going forward will put you closer to point blank range of bullets or any tracking turret.
- The exception is with cone lasers and Doomsday Bomb, where it can be unpredictable when exactly is either of them going to go off, thus making it confusing whether to push upfield or strafe sideways.
- Unlike Doomsday Lasers, the blast duration is short which means you can quickly have enough space to move around again after the blast goes off.
- Even if the Doomsday Bomb is downfield, it can still be possible to avoid Doomsday Bomb by completely cornering yourself to the edge of the screen.
- However, this does involve a fair bit of RNG, where you must observe the Vulture's movement, and go in the opposite direction it is moving towards.
- This technique is used for ships that don't have a focused forward firing main weapon or Vorpal Lance against frontline Vultures with Doomsday Bombs.
- However, this does involve a fair bit of RNG, where you must observe the Vulture's
- The warning signal that Doomsday Bomb is about to go off comes pretty early, and it is easy to see the distinct red border where the Doomsday Bomb will reach.
- The radius is the size of a level 1 Mega Bomb , which is a radius of 300.
- The early warning sign of Doomsday Bomb and the pretty glaring red border is a clear indication to stay clear and you should prepare early to stay out of this border.
- It is even possible to sneak in a charge forward and then retreat attack when the border first appears.
- This technique is particularly useful when using Bullet EMP or Stun EMP against Doomsday Bomb, as you want to maximize the utility of Bullet EMP or Stun EMP.
- Using Personal Shield also protects against Doomsday Bomb, but there is usually little reason to use Personal Shield upfield.
- This technique is particularly useful when using Bullet EMP
- The radius is the size of a level 1 Mega Bomb
- In the context of survival, there is little reason to pop off a Doomsday Bomb.
- This is because staying downfield is a natural part of just aiming to survive.
- Unless it is at a threatening position, which is downfield as with the case of Vultures or Condors .
- At such a position, Vorpal Lances will make good work of them.
- Bullet EMPs and Stun EMPs will also buy you enough time to take them out.
- Popping off one Doomsday Bomb is sufficient, and you should work to eliminate other dangerous turrets after destroying one of the frontline Doomsday Bombs.
- Even for Rocs that are slightly more forward, while popping a front row Doomsday Bomb would help a bit, it does little to help since Doomsday Bombs usually come in mass numbers at the front row, and popping one off does little to alleviate the situation.
- It will help a bit if you pop off Doomsday Bombs from the corner to the center, which you can opt to do so if the turrets at the back row aren't terribly threatening.
- However, there are cases where popping off the Doomsday Bomb opens up an easier way to survive.
- This is especially so against shuriken launchers, since they are slow to turn.
- The same goes for MIRV spreads, since you can avoid them entirely, so long you don't trigger the MIRVs by staying very close to the Doomsday Bomb(s).
- For the purpose of speedrunning, popping off Doomsday Bombs could help when it is on a Vulture to allow you to go near to other Invaders easily to destroy them quickly.
- Otherwise, for other cases, as with Condors and Rocs , unless eliminating Doomsday Bombs allow an easier way to survive, it is better to eliminate other turrets.
- In which case, you can continue staying aggressive by being near to the Invader with the Doomsday Bomb, just retreat downfield just 1 second before the Doomsday Bomb(s) to go off.
- There is not much need for an Aura or Zen to counter it, unless you are intending to speedrun in which case, resetting the Doomsday Bombs is useful.
Trivia: Here's an early teaser version of the Doomsday Bomb, before Doomsday Bomb was first encountered in Phoenix 2:

Doomsday Super MIRV 
- A single Super MIRV deals enough damage to trigger the Phase Out state of any barrier or break any Phalanx.
- Super MIRVs released by Doomsday Super MIRVs require the same number of Point Defence lasers at Ultimate level to eliminate one Super MIRV as the number of lasers required to eliminate a normal MIRV by a non-Ultimate Level Point Defence.
- Super MIRVs also move slightly slower than regular MIRVs, which make them linger on the field much longer, which makes them more annoying especially if you don't intend to trigger them.
- Super MIRVs have a bigger trigger radius than normal MIRVs.
- An Super MIRV can be triggered immediately after it is emitted.
- This is unlike a normal MIRV, which takes 0.5s to be primed before it is allowed to explode into pellets.
- The normal MIRVs produced by a Super MIRV, similarly, also can be triggered immediately after it is split off from its Super MIRV.
- The best strategy, whether speedrunning or surviving, is to destroy these turrets as fast as possible before they can start emitting their Super MIRVs.
- If that is not possible, it should try to be avoided in entirety by staying far away from the Super MIRVs emitted.
- If you have a ship with an auto aiming main weapon , you could go above Doomsday Super MIRVs on a frontline Vulture to avoid it entirely, in the case there are 2 of them.
- Note that due to the large trigger radius of Super MIRVs, for frontline Vultures that appear in Act 4, there is still a slight chance that a Super MIRV will trigger even as you are as upfield as already possible, so be prepared to dodge pellets released by MIRVs from the Super MIRV.
- If you have a ship with an auto aiming main weapon
- Phalanxes are a mediocre defense against Super MIRV.
- A single Phalanx charge has the capability to completely neutralize one Super MIRV.
- But due to the long interval between Super MIRVs, and there are usually 3 or more of them, it is easy to burn through Phalanx charges very quickly.
- What can be done when using Phalanx is to wait for 2 Super MIRVs to appear, then shovel against them to completely neutralize one of them, while mitigating the effects of the other.
- A single Phalanx
- Teleport also does not work too well against Super MIRV since it is only able to fully eliminate one Super MIRV.
- Trying to Teleport between 2 Super MIRVs will result in pellets from behind ship coming towards you, which is a very bad scenario to be in.
- Trying to Teleport
- The best defence is Bullet EMP as it is able to eliminate multiple Super MIRVs, or even simply reset the Doomsday Super MIRV entirely.
- Stunning Doomsday Super MIRVs using Stun EMP or Ion Cannon
 works very well to destroy it quickly as well.
 - Barriers also work well to stop Super MIRVs, although you will need to stand far away so that the Super MIRV doesn't trigger and deal even more damage to the barrier.
- This means you either have an upfield barrier deployed beforehand, or you have a barrier at hand which is large enough to deploy it downfield and not trigger the Super MIRV.
- This means you either have an upfield barrier
- Reflex EMP can work against Super MIRVs.
- The radius of Reflex EMP is just about the same as the trigger radius of Super MIRVs, so the Super MIRVs would trigger anyway.
- Thus, Reflex EMP may not be able to clear the pellet mess left behind by the MIRVs that are produced from the Super MIRV.
- Thankfully, if you retreat downfield afterwards, the Super MIRV triggered would no longer be a threat.
- However, this still does not deal well against the other Super MIRVs emitted later.
- The radius
- While you can technically deploy a Personal Shield just as the Doomsday Super MIRV starts to fire, it is also not an ideal solution as the intervals between Super MIRVs is quite long.
- Therefore, Personal Shield may not even last long enough to block off an entire burst of Super MIRVs.
- Furthermore, you are only inviting more opportunities to be surrounded by other bullets or lasers by the time you exit Personal Shield .
- Therefore, Personal Shield
- For experienced speedrunners, it is possible to do massive grazing off a Super MIRV, similar to grazing off the MIRVs emitted by a pellet MIRV Bloomer.
- This is extremely hard and requires TONS of experience.
Trivia 1: The Doomsday Super MIRV is the successor of the temporarily retired Doomsday MIRV. On the left shows the retired Doomsday MIRV, while on the right shows the successor Doomsday Super MIRV.
Visually, there is only a slight difference between the Doomsday MIRV and the Doomsday Super MIRV. The Doomsday MIRV has chevrons pointing outwards, while the Doomsday Super MIRV has chevrons pointing inwards. Differentiating between them is of no concern because the Doomsday MIRV does not appear anymore at the moment.
Doomsday MIRVs release a short burst of 4 or 5 radially centralized rings (of increasing diameter) of 14 MIRVs equally spaced apart in each ring which spreads out radially, similar to an MIRV Bloomer. Because the positions of the MIRVs are aligned in all rings, it appears that there are 14 straight lines of 4 MIRVs spreading out. The difference is that all these MIRVs are almost instantly armed, in other words, once it appears on field, it will explode almost immediately once you get in range of them.
Here's a pre-released version of the Doomsday MIRV before it got introduced into the game. Note that you will never find Doomsday weapons on an Eagle. It's the same, so this is how it looks like just before firing.
Here's the Doomsday MIRV charge-up and firing sequence in its full glory:
The presence of Doomsday MIRV was represented by the following mission intel icon:
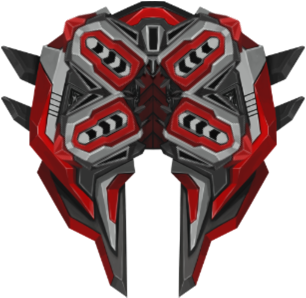

Trivia 2: Here's an Invader weaponry that has not made it into release (yet), but got very far into development and even had a mission intel icon for it. The weapon is called the Bolas which was added in early 2019 with only test variants that were never deployed. Eventually, progress on the Bolas was abandoned. Here's how its mission intel icon looked like:
